Resetting the DNS zone in cPanel involves a few steps. Here's a step-by-step guide:
-
Login to cPanel: Go to your cPanel login page and enter your credentials to log in.
-
Access the DNS Zone Editor: Once logged in, navigate to the "Domains" section or look for "DNS Zone Editor" under the "Domains" or "Advanced" section. Click on it to open.

-
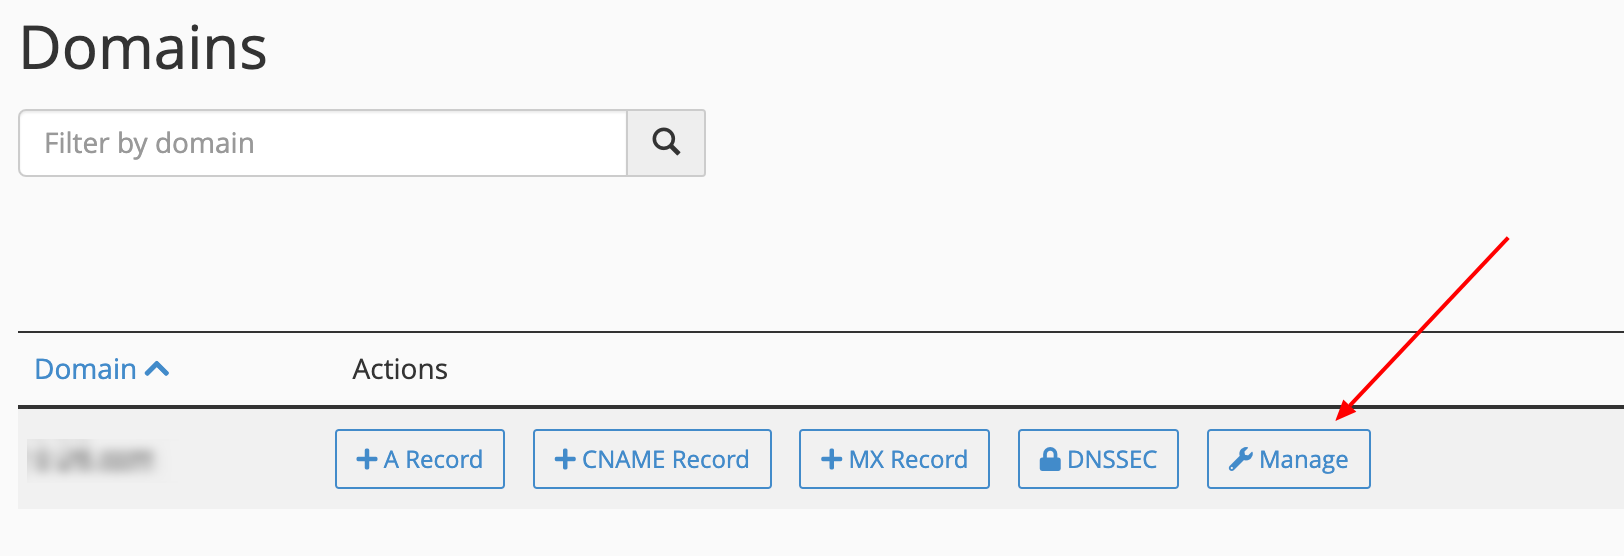
Select the Domain: If you have multiple domains associated with your cPanel account, select the domain for which you want to reset the DNS zone by "Manage" option.

-
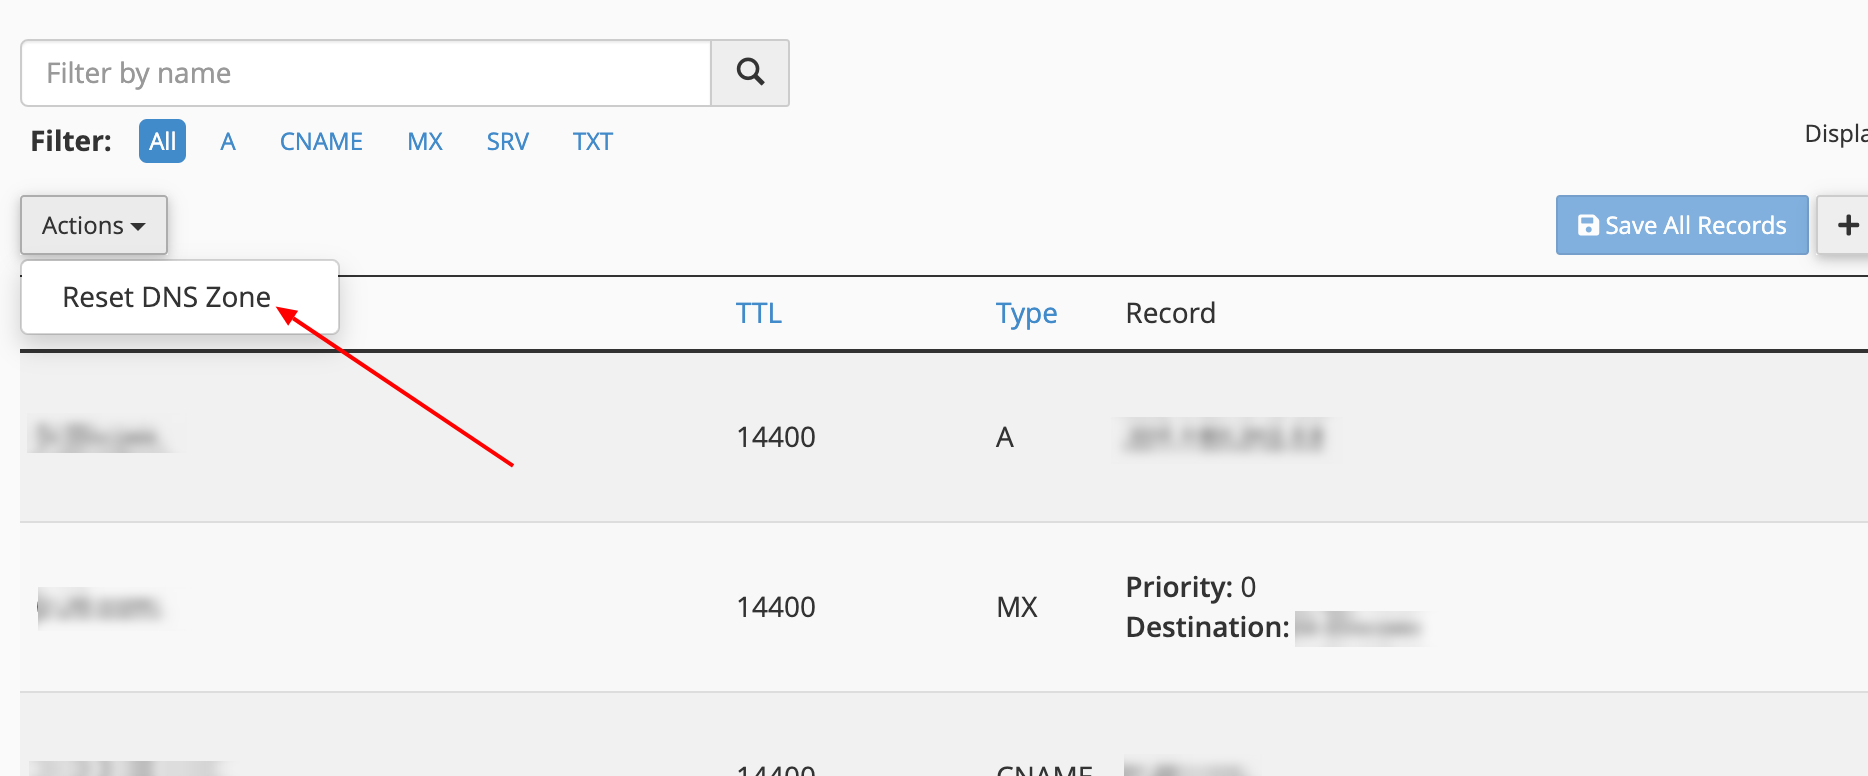
Reset the Zone: Look for an option like "Action" a drop down menu, then "Reset DNS Zone " usually located.

-
Confirmation: Confirm the action. You might be asked to confirm the reset due to the potential impact on your DNS settings. Confirm the reset if you're sure you want to proceed.
-
Wait for the Reset: The DNS zone will be reset to its default state. This process might take a few moments to complete.
-
Verify the Changes: Once the reset is complete, it's a good idea to verify that the DNS records are now at their default state. You can do this by checking the DNS records in the DNS Zone Editor.
-
Make Necessary Adjustments: If needed, you can make adjustments or add custom DNS records after the reset.
-
Testing: Finally, test your website and associated services to ensure they are functioning correctly with the new DNS settings.
That's it! You have successfully reset the DNS zone in cPanel. Remember to exercise caution when resetting DNS zones, as it can affect the functionality of your website and associated services. If you're unsure about any step, it's always a good idea to consult with PromoHosts support team for assistance.


